My Music Video

My Outside Digipak Panels

My Outside Digipak Panels

My Inside Digipak Panels

My Inside Digipak Panels

Please click the image below to view our finished website

Saturday 23 December 2017

Construction Post 6: Website Post-Production

To create and design our artist's website we used Wix. Although none of us had used Wix before, it was very straightforward and by the end we were all comfortable using it.

It was important that we created a cohesive and interactive website to act as a hub for all the necessary information about the artist that worked in syngery with the other products and offered purchasing opportunities.

Home Page

I started off post-production on website and began with the Home page, creating the scrolling background, the video strip background and adding in the album information.
Me editing the focal image for the home page

Below is a photo of our home page. Please click to enlarge and read the annotations.


We also included a social media section at the bottom of the home page where the latest tweets and instagram posts could be seen as well as direct links to Spotify, the artists Instagram, Twitter, Facebook and YouTube channel. This was inspired by the social media section on Jason Derulo's website and a side by side comparison can be seen below.


Music Page

A big part of making money, the music page offers a lot of purchasing opportunities. The music video for 'Cry Me A River' is at the top with a break down of the album's songs below which are designed to take you to PayPal when you try to buy a song or the album.


This page was actually one of the quickest pages to create as it is very straight forward and the only thing we had to wait for to complete it was the edit of the music video.

Tour Page

The Tour page contains all of the dates and venues of AJ's upcoming UK Tour, with links to Ticketmaster to buy tickets.

Below is a screenshot of the table on the tour page.


This page was actually a bit harder to create than some of the others as we originally tried to just edit the dates and venues in the template's tour table. This didn't work however, and in the end Meera created our own table separately and copied it into Wix afterwrads, adding all the buttons and links.

About Page

The About page starts with a quote from British music magazine NME, appealing to the crossoer audience with them.


As well as this, I created a click through Q&A with AJ section on the About page, giving the fans an opportunity to get to know him. Below is an example of this.


Gallery Page

This page consists of photos of AJ both promo shots and behind the scenes from the studio and location shoots. In addition to this we've added the behind the scenes footage of the music video as a fun extra for the fans to enjoy and to show AJ's goofy personality.
Shop Page
Again this page was very important as it was a huge purchasing opportunity for the audience. Whilst we originally thought that this page would be really hard to do, in reality it was a lot easier than we expected. Wix provided a really easy to follow and edit template which we customised for the products that we wanted - screen shots of which can be seen below.

Shop page
Product detail

The only thing I wish we had added to this, was a picture of a second angle of each product as you hover over it with the mouse, but unfortunately we ran out of time to do this. I am still very pleased with this page though and the range of products on offer.


News Page

The News page was were we put our competition, increasing the websites interactivity and linking in with social media as well as information about radio show appearances and an Instagram Live Event.

Below is a picture detailing our competition.


It was important that we had this because it gets the audience involved and actively participating and on social media will in turn help push a viral campaign with positive word of mouth which, ultimately, is the goal as free advertising.

Target Audience Feedback

After talking to members of our primary and secondary TA here are the findings from our feedback.

  • The focal image on the home page was very popular - everyone liked it
  • The repetition of the music video was good on both the home page and music page 
  • The behind the scenes video was funny and gave a good insight into the artist and the excitement of shooting a music video
  • The website was very easy to navigate
  • Social media links should be at the top of the page as well as bottom
I am really pleased with how the website came out overall, as it is clear and easy to use, ultimately doing its job as the main hub for all of the artist's information and we all picked up how to use the software very quickly.


Construction Post 5: Digipak Post-Production

To create our Digipak album cover we used Adobe Photoshop. It was important that we got this right as album art is key in promoting the artist and their music, especially for a debut album, where it introduces the artist to the public and industry.

Below is the template that we used for the front and back outside panels - a similar template was used for the inside panels too.

Template
Outside Panels

Below is a picture of our final outside panels.


For the digipak I cut out both photos for the front and back panel using the select tool and and refine edge, taking care to paint back in any of Laith's hair that got cut to give a clean and believable look. In addition to this I edited the writing out of the original picture of the background for the back cover.

Me editing the front panel

For our artist name, album and song titles we had to download two new fonts: World Conflict and Questrial-Regular.

We chose World Conflict because we wanted something tat would stand out and look good repeated across all of the marketing platforms. The edgy, spray paint look fit with the British independent vibe we were creating as well as the simple, grungy, grey background.

World Conflict font 

For the album and song titles we wanted something simple and professional that contrasted nicely with World Conflict and didn't take away from the focal image. In the end we settled on Questrial-Regular.

Questrial-Regular font

Both the backgrounds for the front and back cover were a similar grungy, grey colour with texture. As seen in our research and planning post this followed genre conventions and allowed the focus to stay on the artist's image which as a debut album is very important. Our main inspiration for the backgrounds was from 'The Best of Amy Winehouse's album cover which can be seen below.


For institutional information the back cover was very important and we had to ensure we included the record label logo, barcode, artist website, album release date and copyright.


Inside Panels

Below is a picture of our inside panels


Our inside left panel consists of a black and grey gradient of AJ's side profile filled with words that mean something to him and the album. Included are words such as 'dignity', 'change' and 'forgiveness', words that express AJ as a person and as an artist who wants to create music that really matters to people. We hoped that this idea would not only look visually interesting but also add a personal touch, as all the things that went round AJ's head when creating the album, giving an authentic feel to the digipak.

The right hand panel where the CD would be is a simple MS from behind AJ. We made the photo black and white to fit with the rest of the digipak and the black, grey and white colour scheme. We kept this panel simple as most of the time it would be covered by the CD.

In keeping with British indie feel and an artist that wants to bring back elements of old school R&B we thought that the simpler we kept the digipak concept the more effective it would be, especially with its colour scheme.

Target Audience Feedback

After speaking to members of both our primary and secondary audience we collected the following feedback on our digipak.

  • The colour scheme works really well and is eye-catching
  • The inside panel with the side profile and words was the favourite as it really stood out and wasn't commonly done 
  • It looked professional
  • It wasn't always recognisable as R&B but those who said that went on to say that they would still look at the album because it was eye-catching and introduced the artist well
I am very pleased with our digipak and I really enjoyed editing the photos and creating the final product. I love the aesthetic we've gone for and am pleased that ideas I was really excited about carrying out right at the beginning of the project, such as the words in the head, actually came out really well and was liked by others.

Construction Post 4: Music Video Post-Production

We edited our music video using Adobe Premiere Pro which we used last year for the AS and at GCSE.
Me editing on Adobe Premiere Pro

We stared by watching our rushes through and renaming them in their folders of day and time they were shot and uploaded. Although it was good that we had a lot of different takes and therefore choice, this did mean it took us a lot longer than we would have liked to rename them all. From there we chose the best overall take for each lipsync and synced them with our track so that when we needed a shot we could just cut in and out of what was already there and it was already synced, saving time later down the line.


We decided as a group to share the responsibility for completing each of the products, so that we all had a good amount of time to work on each. During the last week though, with the deadline approaching, we all took the product we were quickest at doing and went where we were most skilled to ensure we finished on time. For the edit my main contribution was editing the second half of the video, the dance break, grading and fine tuning the cuts throughout.

Changes from test edit

One of the big changes we made from the test edit was being more daring with our framing choices and how they worked together. For example in our test it tended to get visually boring with mainly just MLS and MS but in our real edit we made sure to be a bit more daring and actually follow music video editing conventions of going from CUs to LS - really varied framing.

Below you can see a comparison of the framing we had for the test and real edit.
Example of similar framing throughout test edit
More varied framing in real edit
Another change from the test edit was the addition of fades to and from black as transitions. Laith edited a lot of these in and we think it works really well, having been done in a lot of R&B music videos and made the integration of our narrative shots a lot smoother.

Below is an example of a lipsync fade to black and the narrative shot fade from black that follows it.


Effects

When we first edited the dance break we realised that even with the cuts to different angles and switching to me and Meera doing the choreography at some points - inspired by the dance sequence in Ne-Yo's Miss Independent - it still looked a bit boring and not quite what we had envisioned. To try and improve this, after speaking to our teachers who suggested trying an effect, I added a ghosting effect where I layered a duplicate of each shot on top of the original, starting it a few frames later and turning down the opacity. Although there is a tool that can do this automatically, when I tried that in the beginning it ghosted the footage too much and as you can't change the levels we had to do it manually. In the end I was actually really pleased with how the ghosting came out as it made the dance break a bit edgier, contrasting nicely with the rest of the video.


Revisions

Once we had a complete timeline and were moving onto fine tuning, we asked our media teachers and technician to look at our video and give their opinion. The main thing that we got back was that they thought we were playing it too safe with out edit and we needed to experiment a bit more. In response to this we tightened up a lot of cuts and varied our shot length a lot more. We also added jump cuts into the end of the argument to give a more trippy feel to the sequnce, which can be sen below.


Laith and I also spent time going through the completed timeline shot by shot, picking out little things we wanted to change, for example we moved the narrative up as we felt that it became too rushed towards the end, and we needed to break up a long sequence of lip sync over the first pre-chorus.

Target Audience Feedback

Once we had made our own revisions and those based on our teachers' feedback, we asked members of both our primary (R&B fans) and secondary (12-25 year olds) TA for their feedback.

The response that we got from both was very positive with everyone saying that to them it really did look like an R&B music video - meeting their expectations. Everyone asked also said that they could follow the narrative and that there was clear links to it and the song's lyrics.

The shots that went down the best were:


  • Silhouetted dance shots


  • Screen shadow shots


  • Quick pan into studio


I was so pleased that these three were picked out as the audiences' favourites because they are the ones that we liked the best as well.

In addition to the music video, Meera edited a short behind the scenes video that includes bloopers and shows just how much fun we had making the music video. This will be used on the website as a fun extra for the fans.


Below is our final music video:


Overall I really enjoyed editing the music video because it was a lot of fun to watch all of footage and to have a hand in turning all of that into a video that looks professional and effective and that we are actually proud of. I got to try new editing techniques and effects that I hadn't used before and had the opportunity to get really creative and daring with the edit. We worked well as a group, with everyone having a say and getting to explore their own creative ideas and we all agreed that it came out a lot better than we were expecting after the test edit.

Friday 22 December 2017

Construction Post 3: Week 3 Production

Week 3 of production for us was our promo photo shoot, which we carried out in school with the set up seen below.


Throughout the week we had a tutorial and 4 sessions - one a practice and the other three were main ones. We had planned the poses and costumes we wanted in advance during the research and planning stage. We ended up with 5 different costumes and a range of poses from standing to sitting with various different lighting, showing off our artist's personality as well as conforming to R&B genre conventions with low-key, more moody lighting.

Below are some of the promo shots.


I was mainly responsible for taking the promo shots as well as directing Laith on the ones that Meera took. I also got to set up and adjust the lighting which was really fun because I hadn't done this before.

Me taking a photo
Me adjusting a light


The photo shoot went really well and I enjoyed the whole process. We got some really good photos, I think, that get across our artist's genre and personality and that will look really good on the website and digipak.

Construction Post 2: Week 2 Production

The second week of production was the main shoot for our group which consisted of filming the bulk of our video in the studio at school plus a one day location shoot.

At the end of the previous week we had ensured that we had a detailed schedule for this week, detailing who was going to be in the studio for each session and exactly what shots we would be filming. This was then checked against a list of all the shots we had said we wanted during research and planning to make sure that we had't missed anything out. In addition this made it easy for us to create a call sheet for each of our actors and keep on schedule.

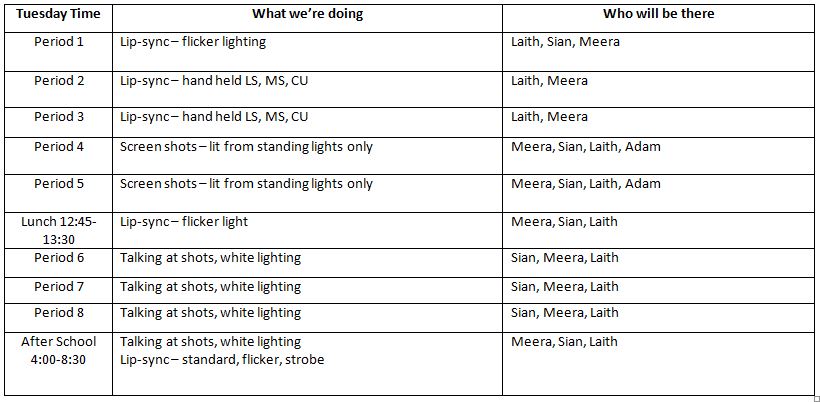
Below is a copy of our group schedule:


Monday

Below is a copy of the detailed schedule for Monday's shoot in the studio:

As seen in the schedule we planned to spend the first period perfecting the 'standard' ipsync lighting which from our test shoot we had identified as being too 'flat' and boring. However, things didn't go to plan as we spent the morning trying to create the infinity curve so that the join between the floor and cyclorama couldn't be seen. We had done this during the prelim and really liked how it looked but unfortunately as our lighting was a lot more low-key, it was very obvious that paper had been placed over the join.

Monitor showing the attempted infinity curve
Attempt at creating the infinity curve

After trying both A4 and A3 paper to create the curve, we decided as a group that it just wasn't working and that we would scrap the idea.

By this point it was scheduled in for us to film the boys dancing but we decided to actually just have them rehearse with Meera, whilst Laith and I tightened the cyclorama to get as polished as look as possible. Although putting us a bit further behind schedule, it was actually really helpful having this rehearsal time as it let the guys get used to dancing in the studio with the lights and really perform. Getting back to what was planned, after school we did film the guys group dancing and it went a lot smoother than I originally thought it would and, as Laith was in the shots, Meera and I took turns dircting and filming from various different angles so that we would have plenty of choice when it came to the edit. 


Me filming the guys group dance

Tuesday

Below is a copy of our schedule for Tuesday


Tuesday was a very important day for us as it was one of the two longer days where we had till 8:30 in the evening, giving us plenty of time to try and catch up on the missed morning Monday. 

Set ups for Tuesday
We started the day filming the lipsyncs with the 'flicker' lghting as that needed all three of us - Laith performing, Meera filming and directing and myself using the reflector to get the lighting effect.

Filming the flicker shots
Once the standing light was in the right place, these shots were relatively easy to film and we managed a lot of good takes in that first session. 

Following the schedule, Meera and Laith then filmed some hand held lipsyncs whilst I was in lessons, before we all came back together with Adam, one of our extra actors, to do the shadow screen shots, an example of which can be seen below.


This was actually quite complicated to set up as the standing lights had to be in very specific places for the shadows to appear as the right size and colour, without creating an awkward line of light down the middle where the two met. I was actually acting in these shots as one of the shadows and I'm really pleased with how they came out. We got through a lot of takes, which we all looked through after and really liked, putting us back on schedule for this as we didn't need to use our back up session for this type of shot. In addition to this, we got really good audience feedback on this shot, with everyone saying that they thought it looked really cool and the concept of it worked very well.

We then revised the schedule to include more hand held lipsyncs and pushed back the talking at shots till after school as we believed that since we had lost time the day before it was important that we got a good range of lipsyncs done to a high standard as soon as possible. 

Me filming a hand held lipsync

It was actually good to do the hand held shots then as having all three of us there meant that Meera could cable bash whilst I filmed so that I didn't trip over anything.

After school we focused on getting the talking at shots done where Laith spoke at me, whilst I looked indifferent. We filmed from both sides so that we could edit it together in sequences where Laith changed side part way through lines to give a more discontinuous feel to the edit. This was inspired by the video for Skylar Grey's 'Back From the Dead'. A side by side of the shots can be seen below.


We actually finished these shots ahead of schedule and in order to try and catch up to where we should be, we ended up filming some more flicker lipsyncs in both LS and MS.

Wednesday


On Wednesday we were faced with another problem in that when we were setting up in the morning the camera wouldn't read the SD card and it turned out that one of the prongs in the camera was broken. Fortunately, our teachers did manage to find a repair shop which would have the camera ready by Thursday morning for us to use, but this did put us a day behind. 

We were given a replacement camera, the Canon Legria HFG30, which we use for location shoots, but for the studio the difference in camera quality to the Canon 5D MK 11, was huge and actually meant that our lighting looked completely different to before and how we wanted it to, and in the case of the backlit shots, just didn't work. 
Laith practising his dancing


Instead of carrying on filming on the HFG30 we decided to use the time rehearsing the dancing shots for all three of us. Although not what we had planned and we didn't get to film anything we could use on Wednesday, the rehearsal time was helpful as it meant we could get used to really selling the performance and making sure it looked authentic.


Thursday


The camera was fixed by Thursday morning so we could resume filming. We decided to continue with what was planned for Laith's dancing and just added in the optional sessions for me and Meera to film our dancing.

Despite the stress of being a day behind, we all just knuckled down and worked really hard to get back on schedule and keep each other motivated when everything started to get on top of us. 

Below are some examples of the dance shots we took.


After school we filmed more lipsyncs with the flicker lighting and some hand held, as well as the reverse talking at shots where I am pleading for forgiveness. Again this went better than I expected and we got through the shots quicker than we thought we would. We even managed to do the walking in shot for the first line where Laith starts out of focus. This was really fun to film because we were using a different lens with a very small depth of field, which allowed us to be a bit more creative and I think looks really good in the final edit.

shot at end of first line

Friday


Example page of my notes on rushes
By this point we were on our second or third session for each type of shot, with the exception of the dance shots with me and Laith which we got done fairly quickly. In the schedule there were several optional sessions blocked in for me and Meera where we sat down and looked through the rushes and made notes on anything that needed to be redone or didn't quite work.

In addition to this, as me and Meera had filmed all of our dancing with the blue lighting, we filmed us with the white backlit doing the choreography for the dance break so that we could make the edit choppier and switch between us and the guys.


Saturday


On Saturday we carried on re-filming anything that we didn't think we'd executed quite right earlier in the week, including Laith's solo dancing and lipsyncs.

As we didn't need to use the scheduled in time for the screen shadown shots, we took the time to take more hand held lipsync with tighter framer, for example more ECUs which can be seen below.


That afternoon was the last studio session and it consisted of us filming the remainder of the dance break and some small dance sections for throughout the rest of the video, for example the lean up in the first verse.


Sunday

The plan for Sunday was too film all of the narrative shots as we had already done the location lipsyncs the previous weekend. Below is a sample from our narrative shootboard. 


So that our extra actor, Adam, didn't have to wait around when he wasn't needed we decided to film everything with him first and then move on to the shots with me and Laith in the afternoon. These consisted of a series of shots in Meera's neighbour's house and the park which Meera and Laith took turns filming and directing. 

Example shot from Sunday
Whilst in the park Meera also took some promo shots for the website, examples of which can be seen below. 


For the afternoon we filmed the narrative shots of me and Laith against the wall first,before moving inside to film the sofa shots and argument sequence.

Argument and sofa shots from narrative

Overall, despite being a bit stressful with quite a few problems, our main shoot week was a lot of fun and in the end went alright, with the whole group being proud of our work. By the end of the week we had managed to completely catch up and get everything filmed that we needed and I was confident using both the sound and lighting desk as well as the 5D camera and monitor. I particularly enjoyed filming the hand held shots and using the reflector for the flicker lighting because I think those shots came out really well. On the whole we worked so well together as a group and think that if we keep that up we can create a music video, digipak and website that we can all be really proud of.
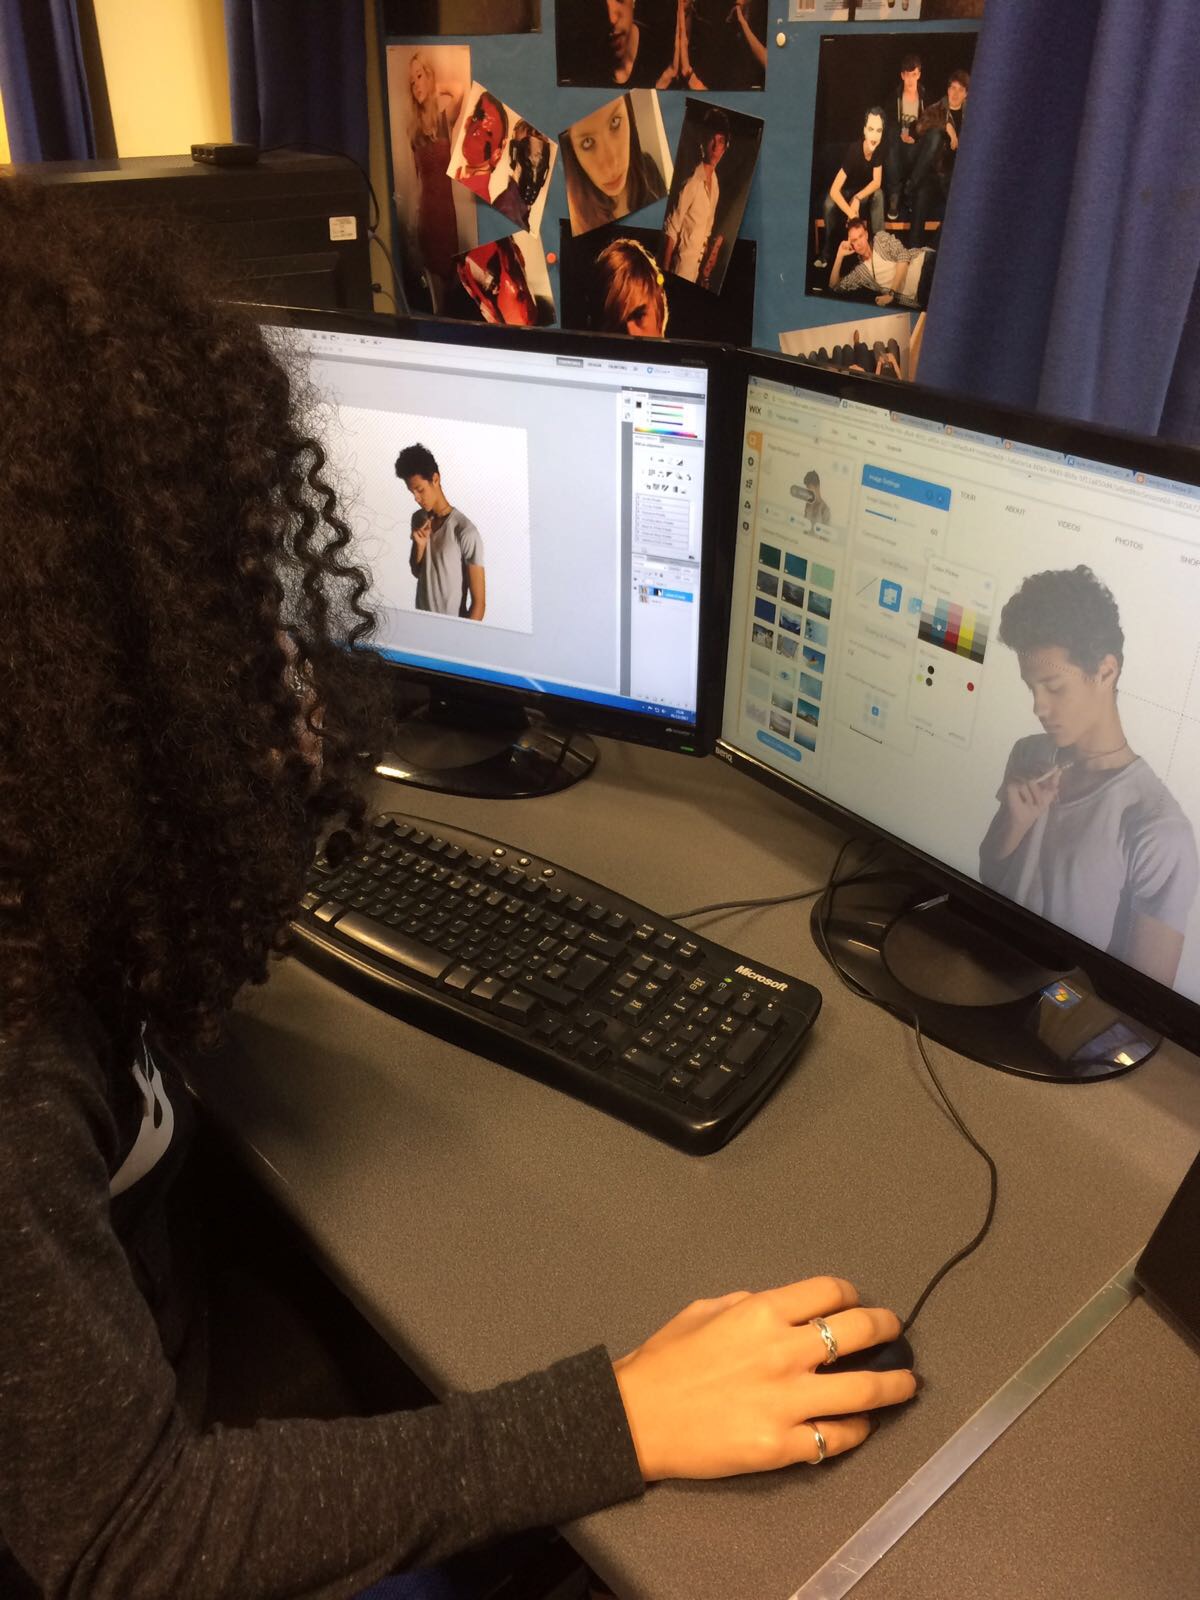
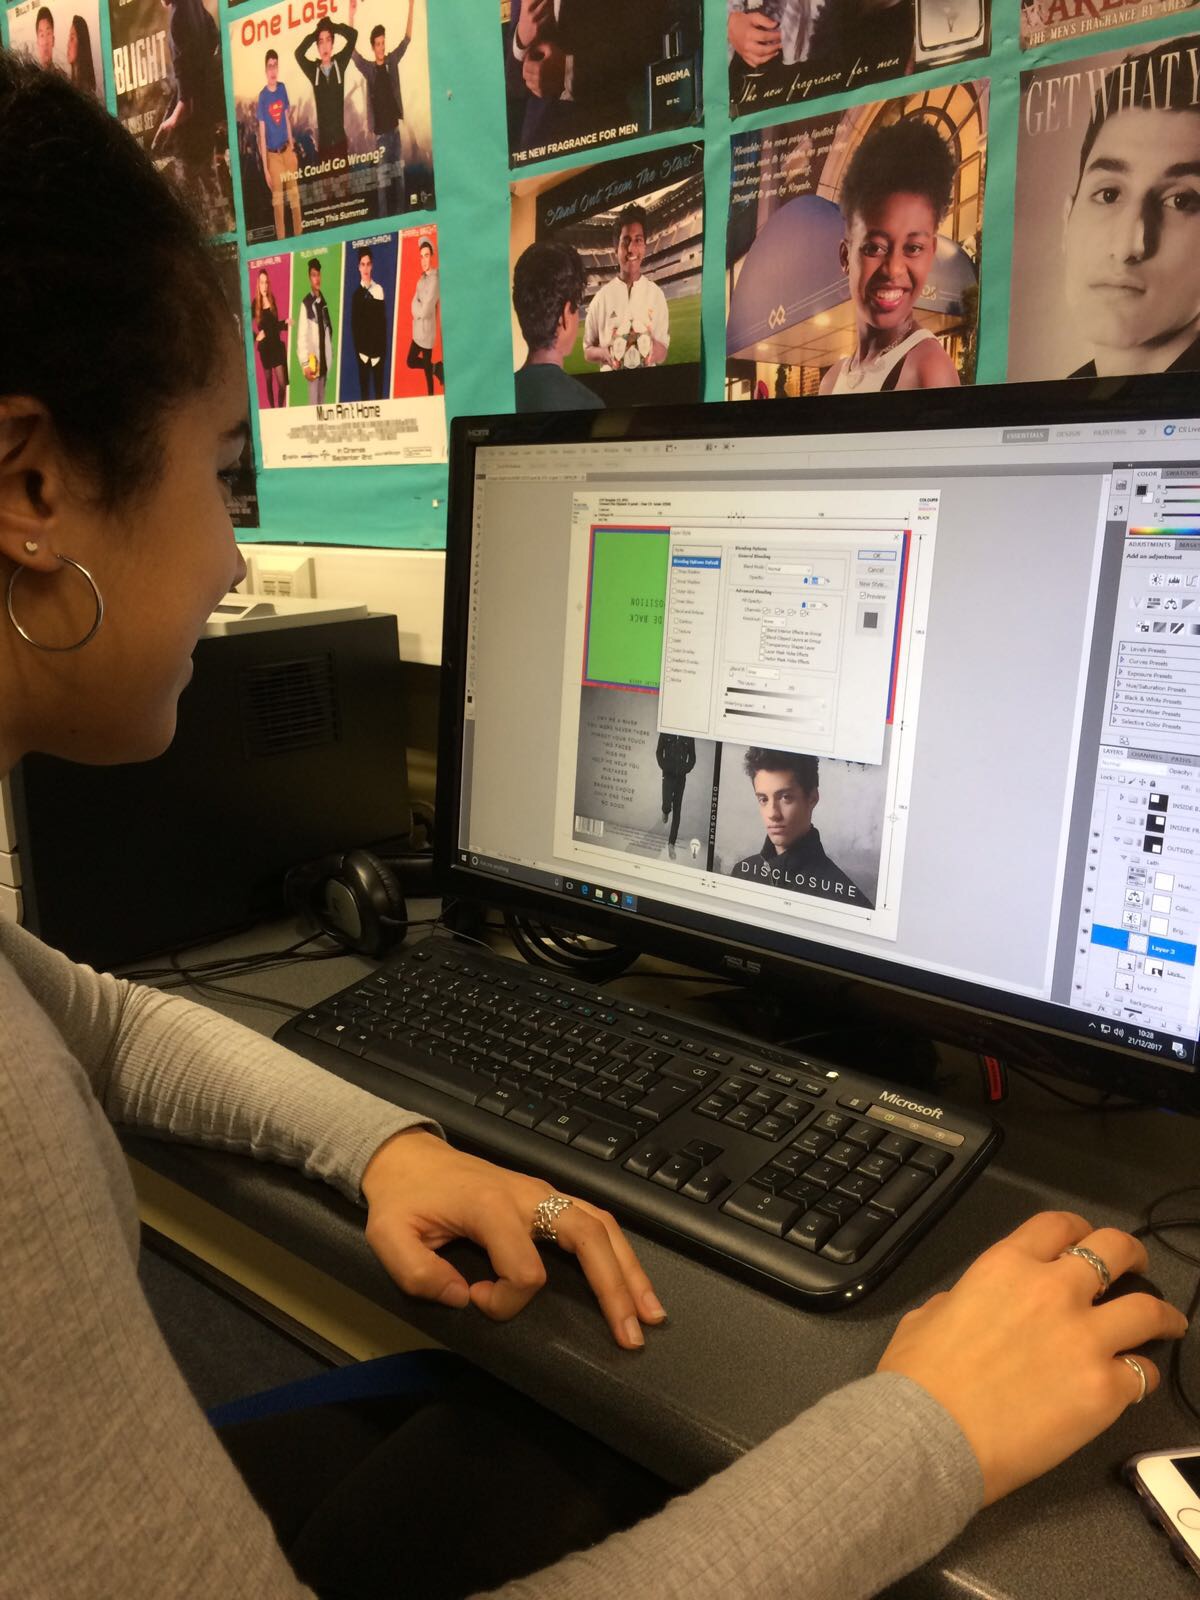